We remain fully operational. Our teams are working around the clock to ensure your deliveries continue safely.

DOWNLOAD THE APP


Customer Services
Copyright © 2025 Desertcart Holdings Limited
DOWNLOAD THE APP


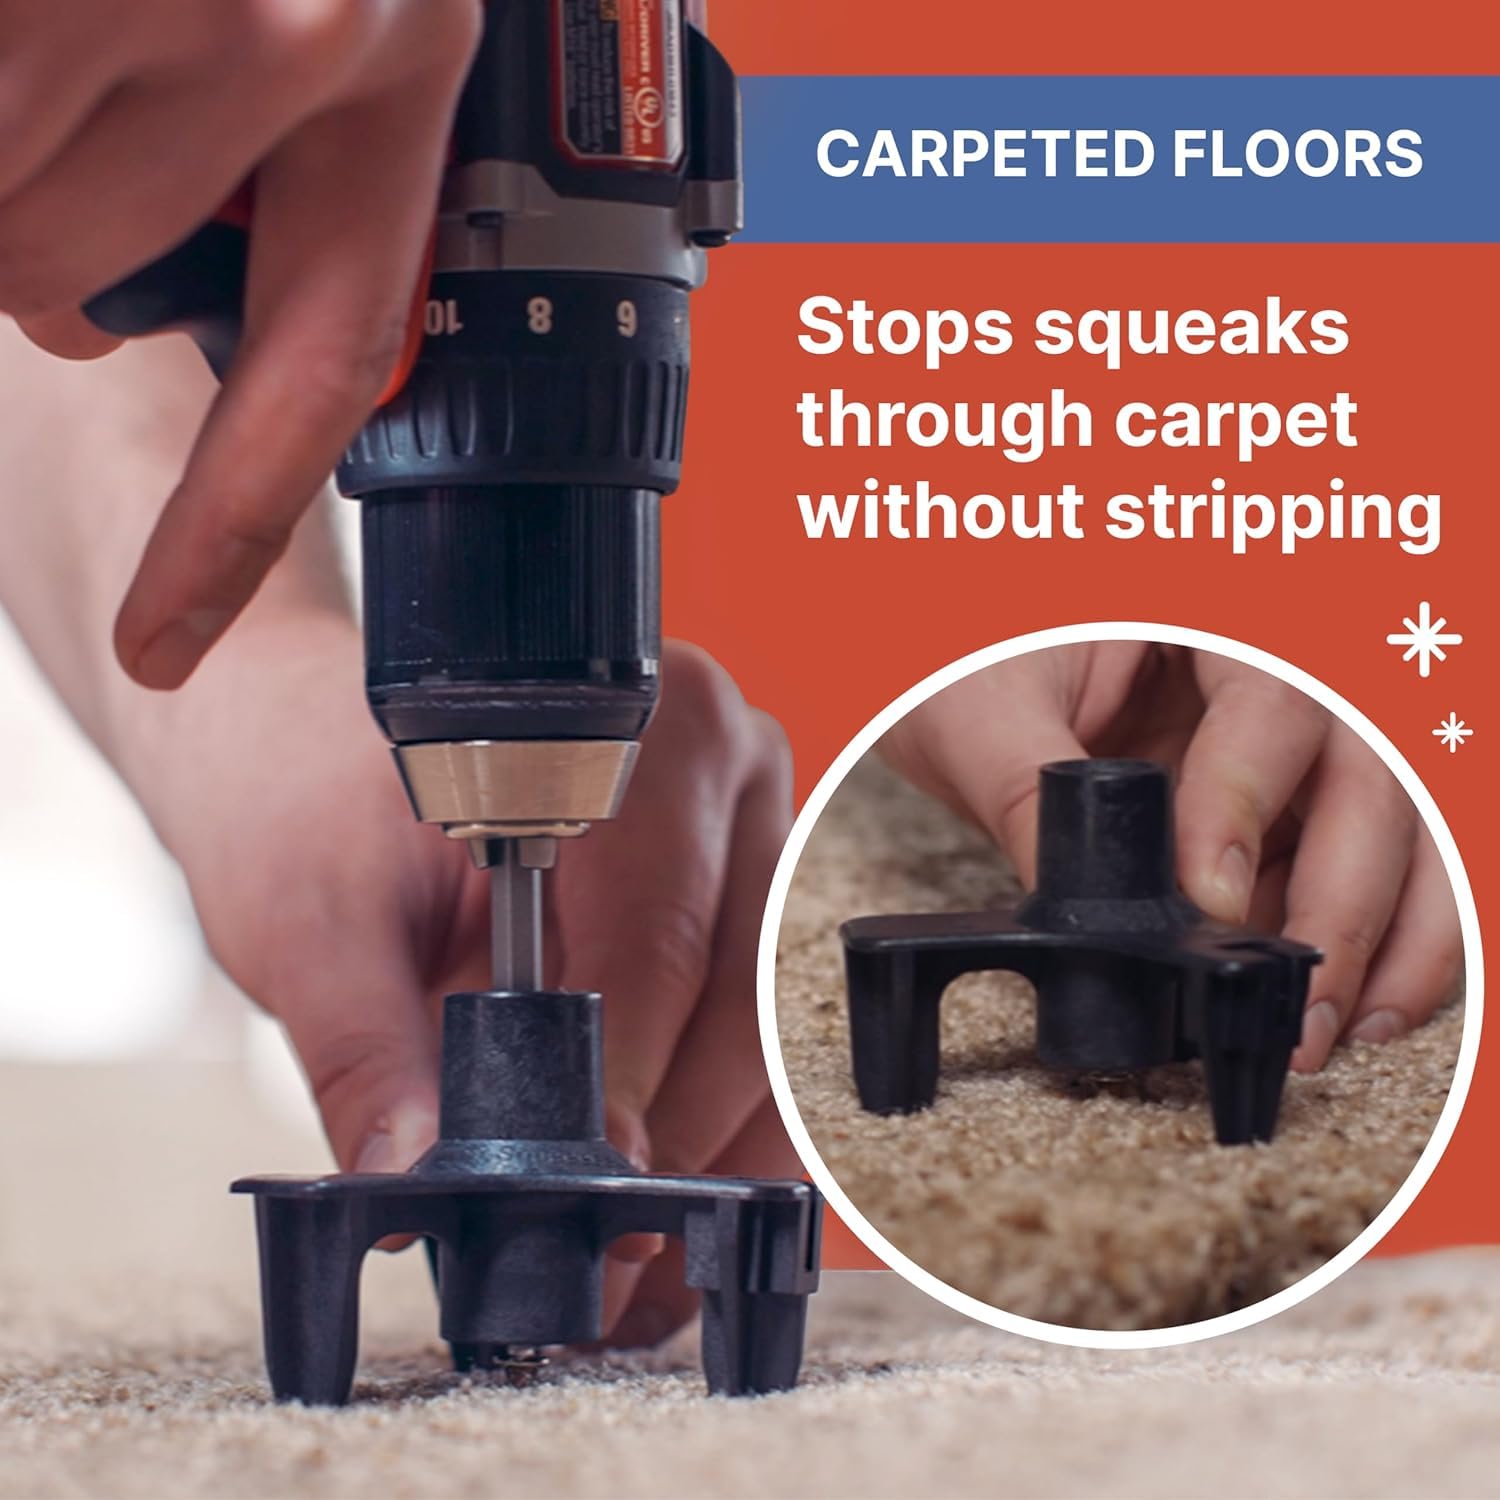


🔧 Quiet floors, confident steps—fix squeaks like a pro!
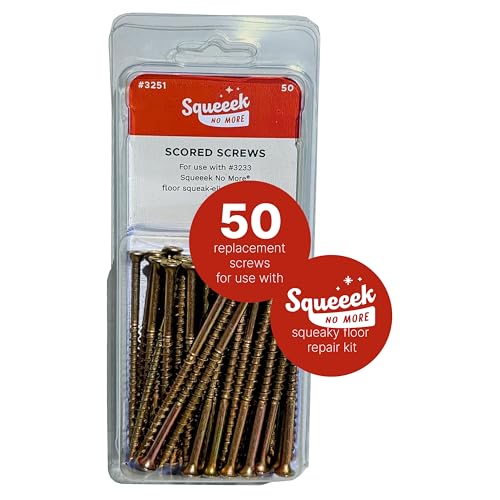
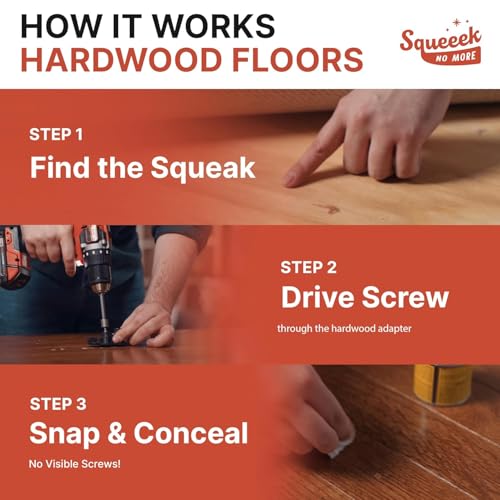
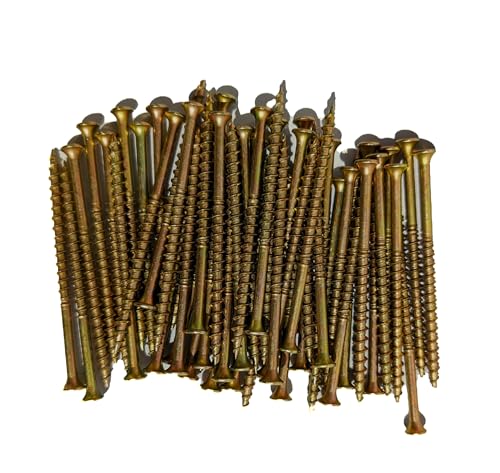
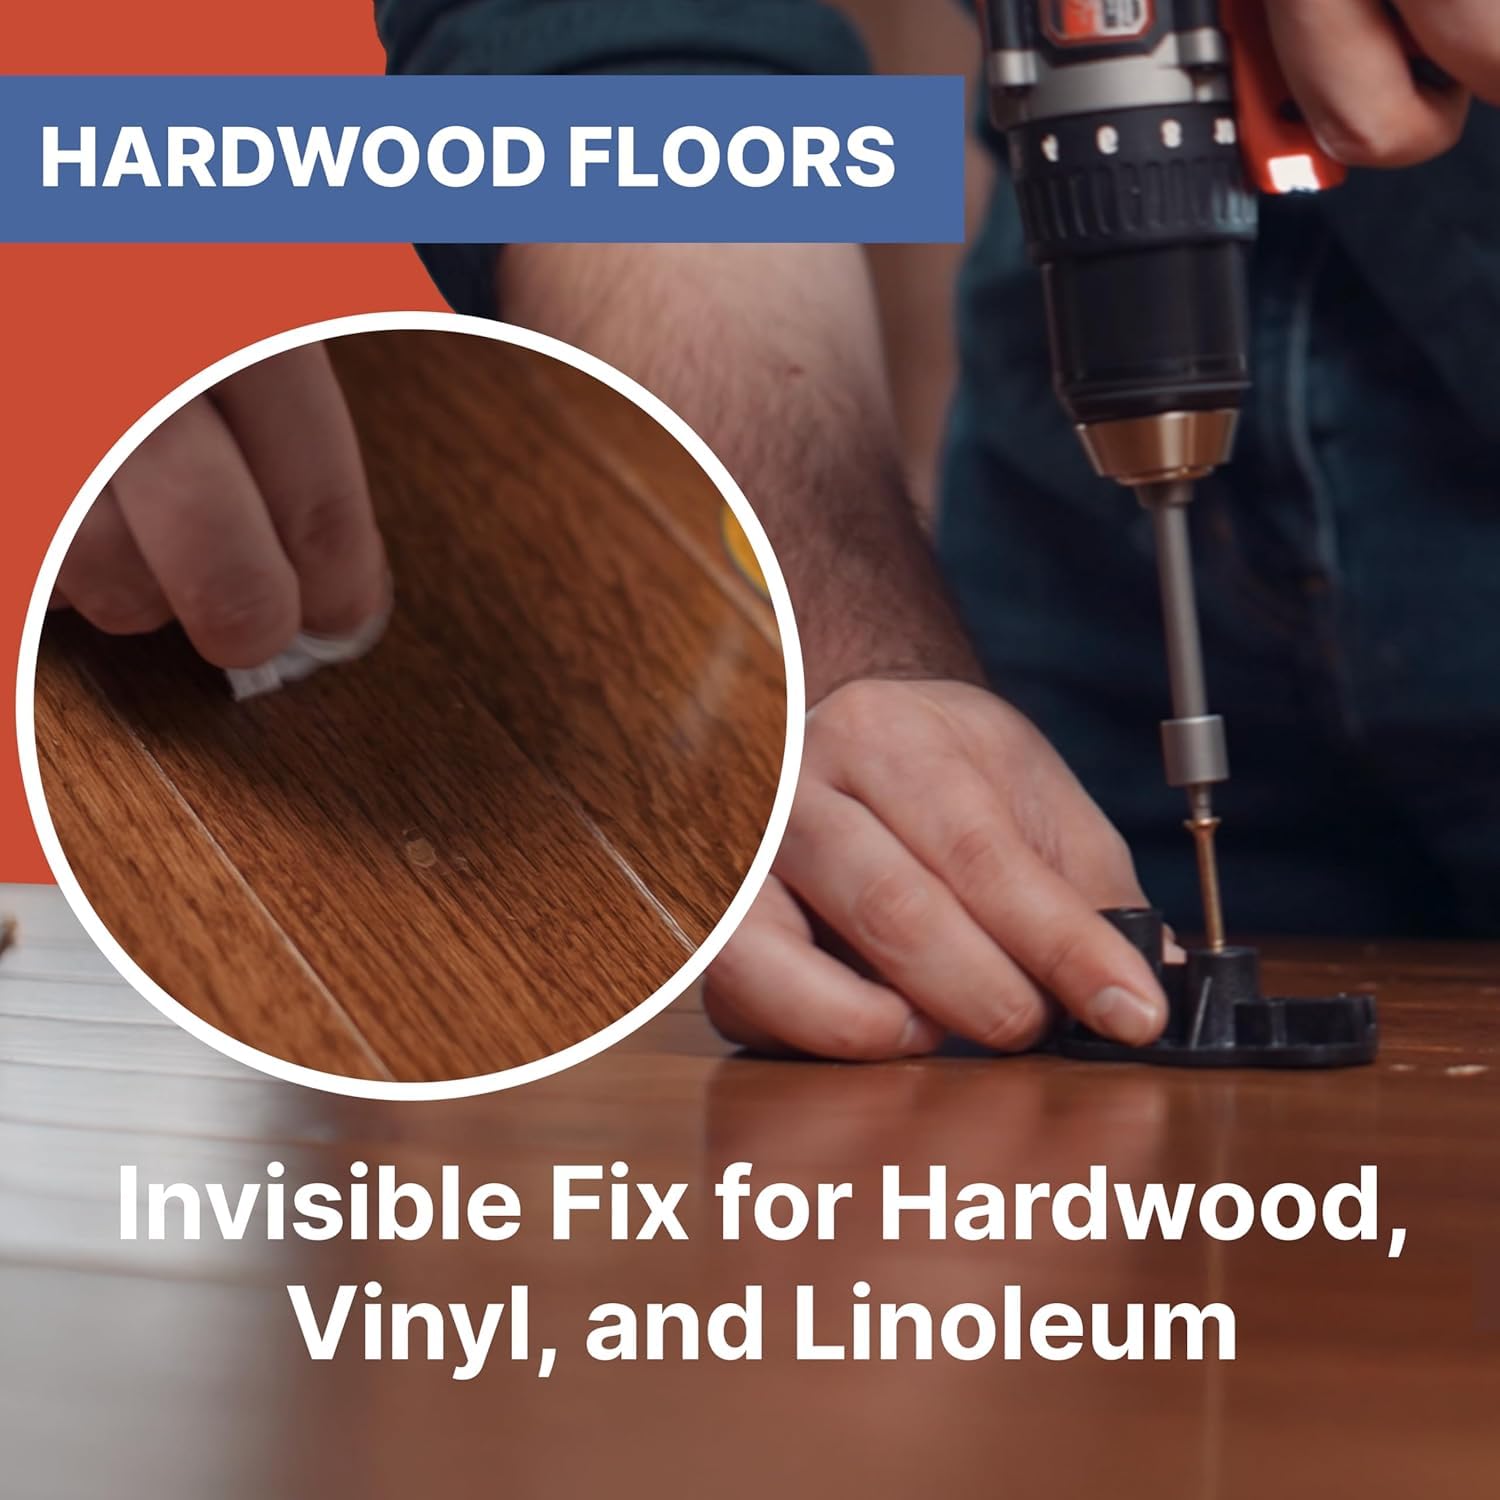
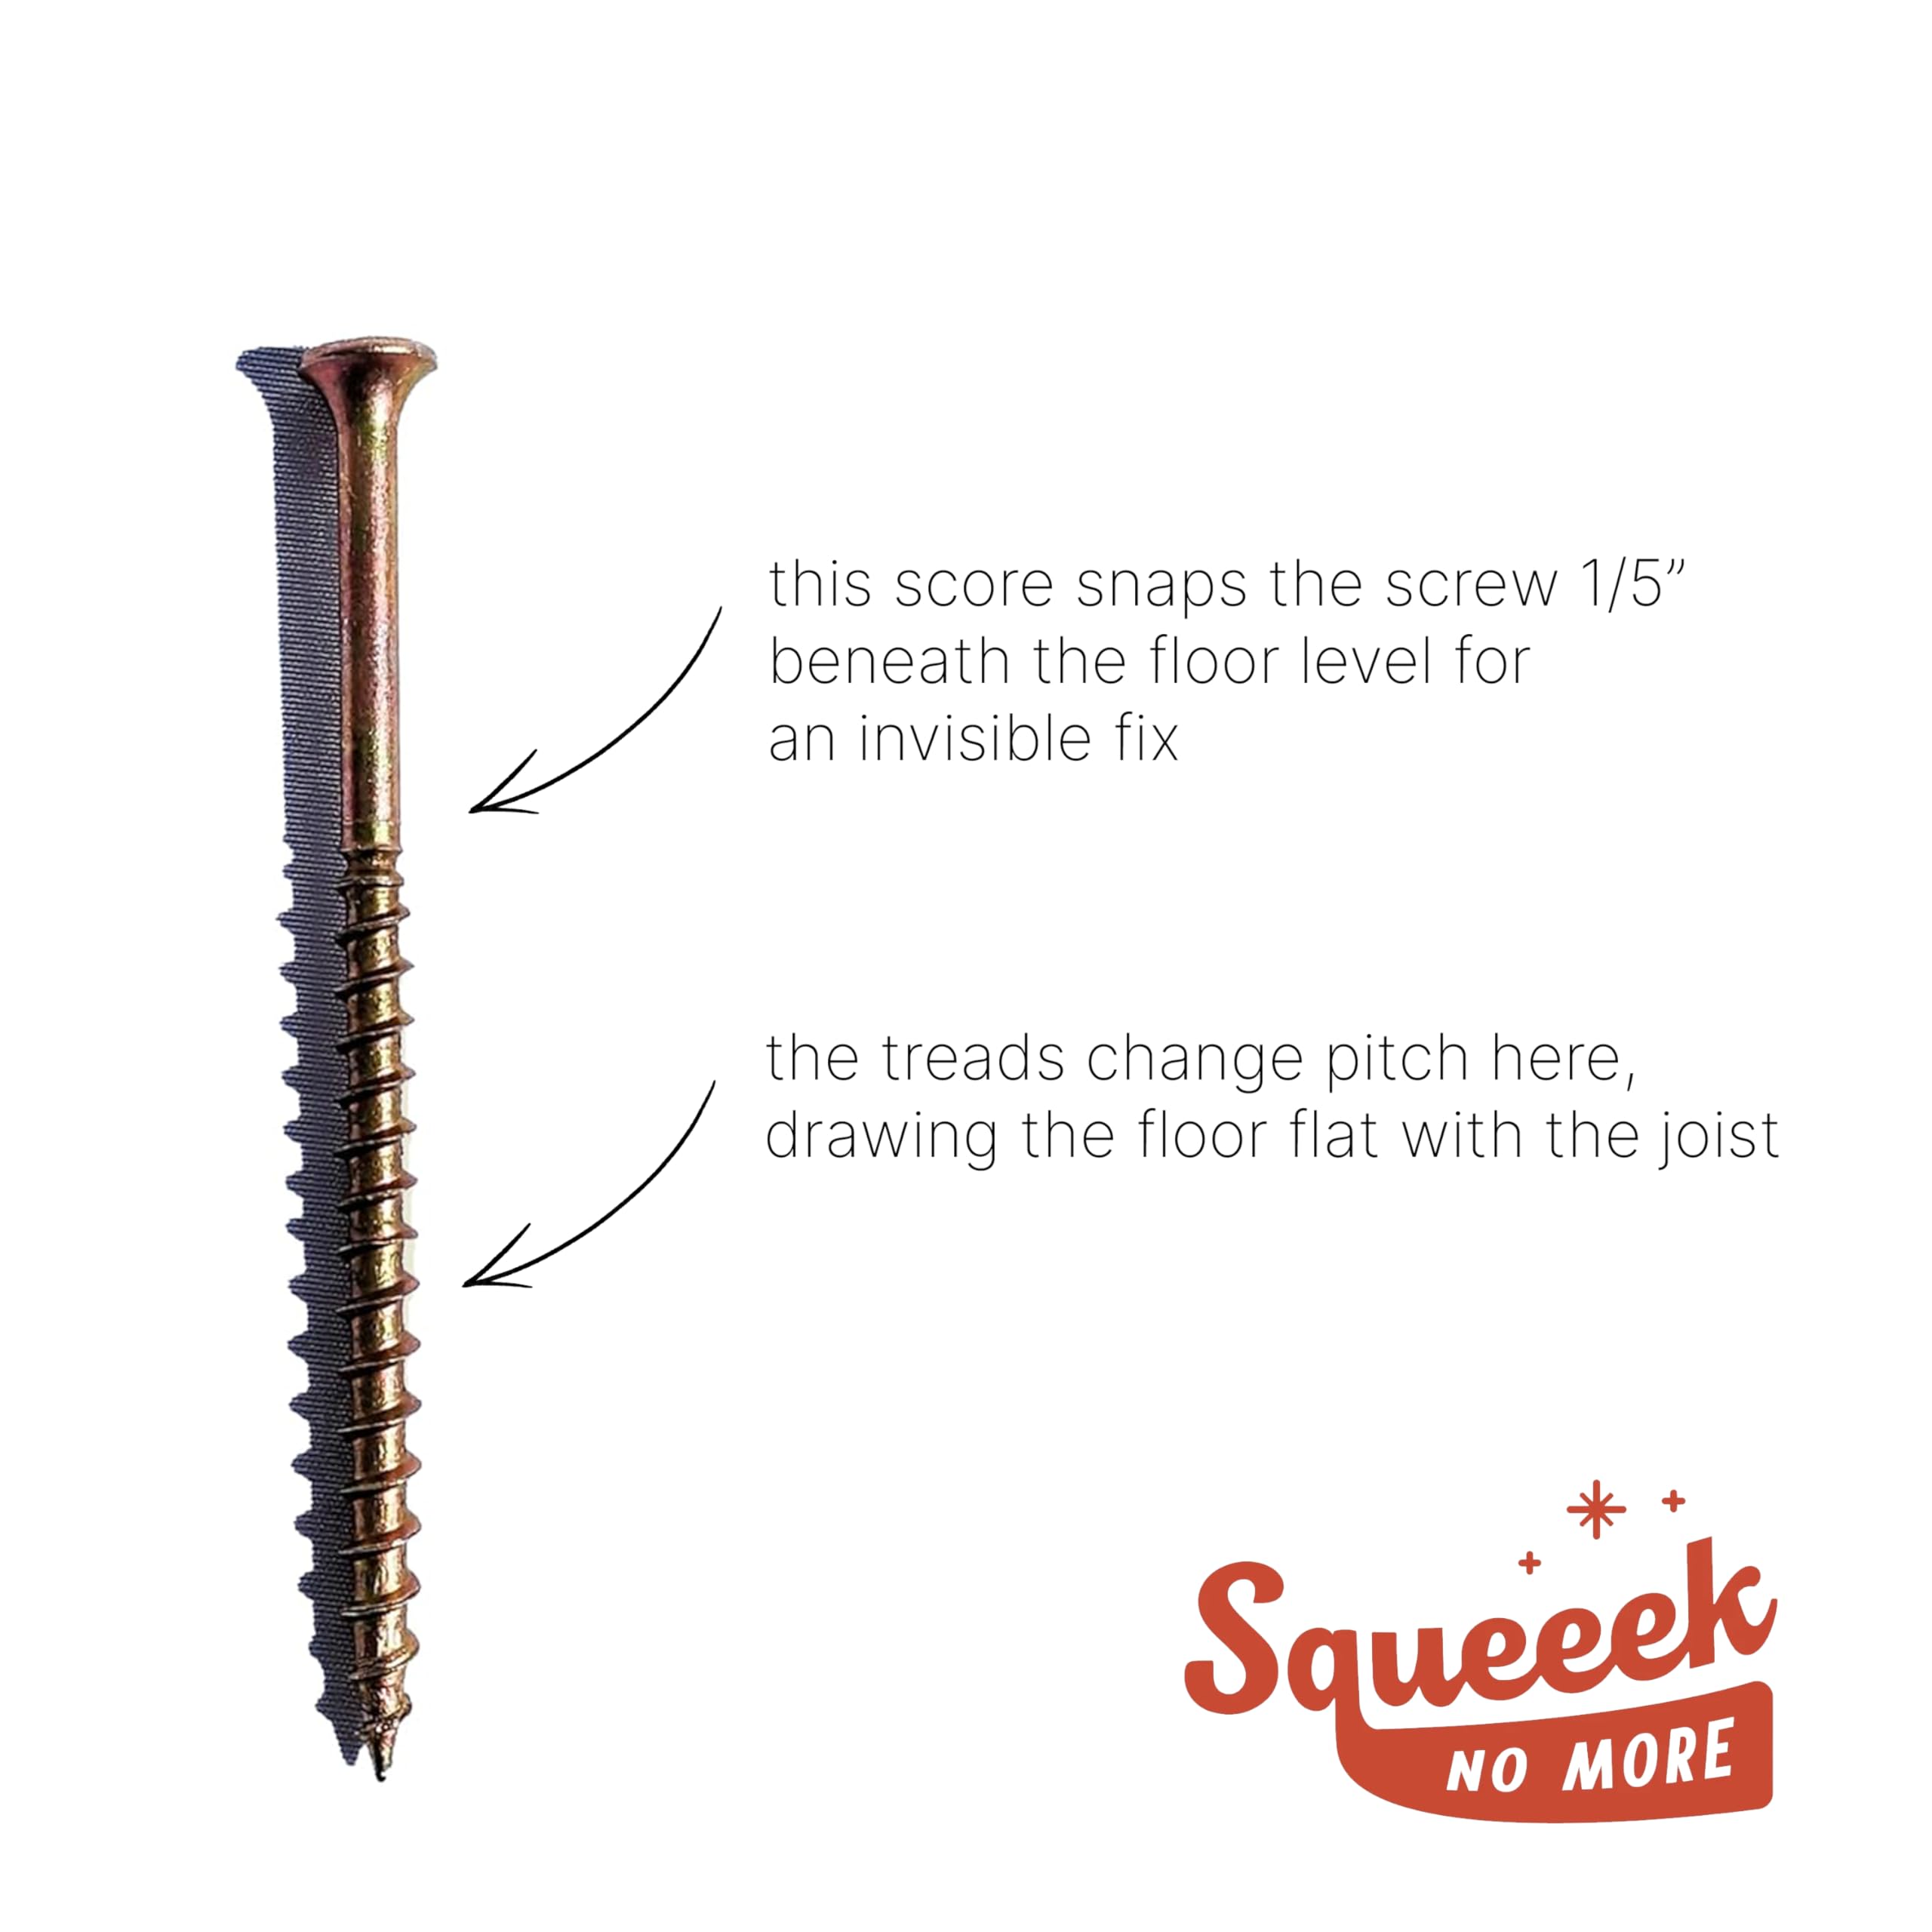
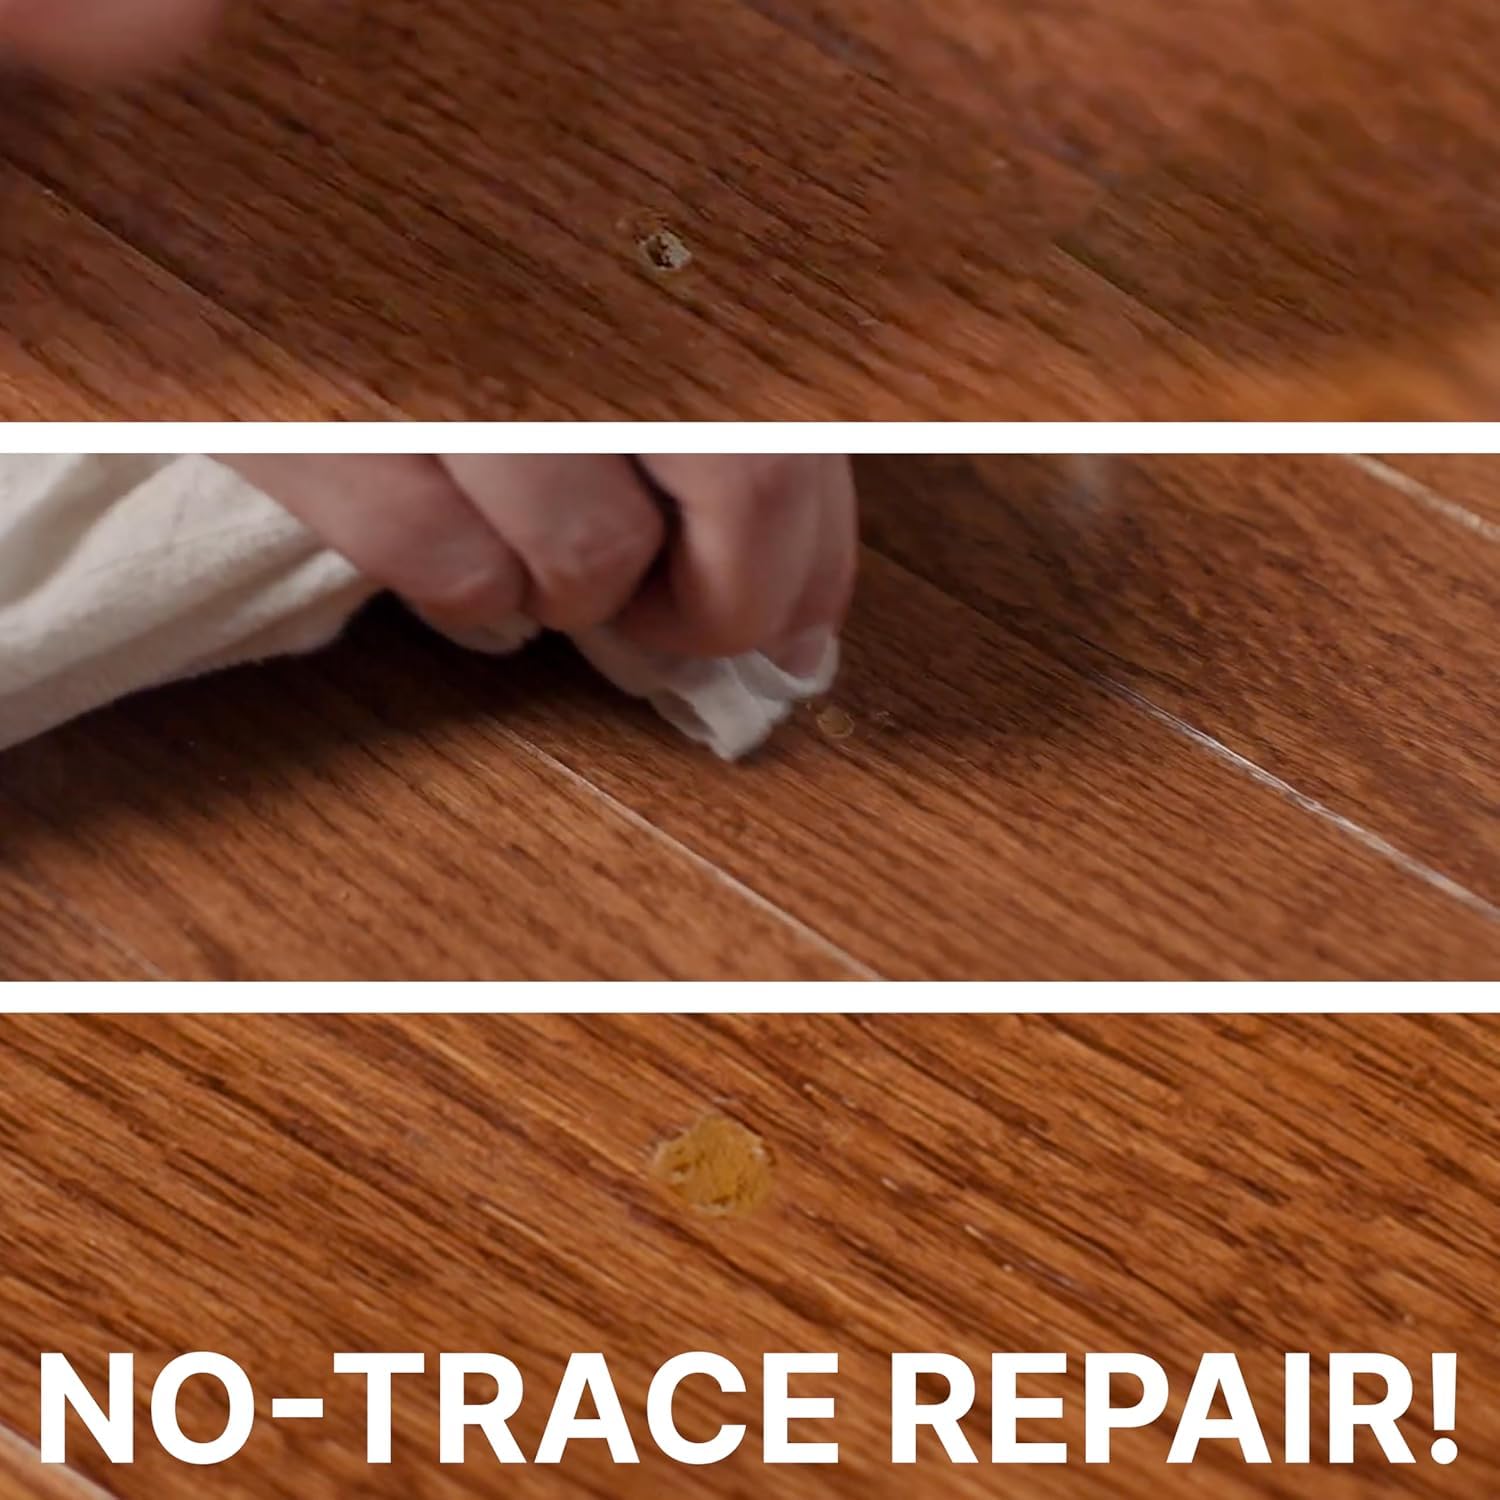
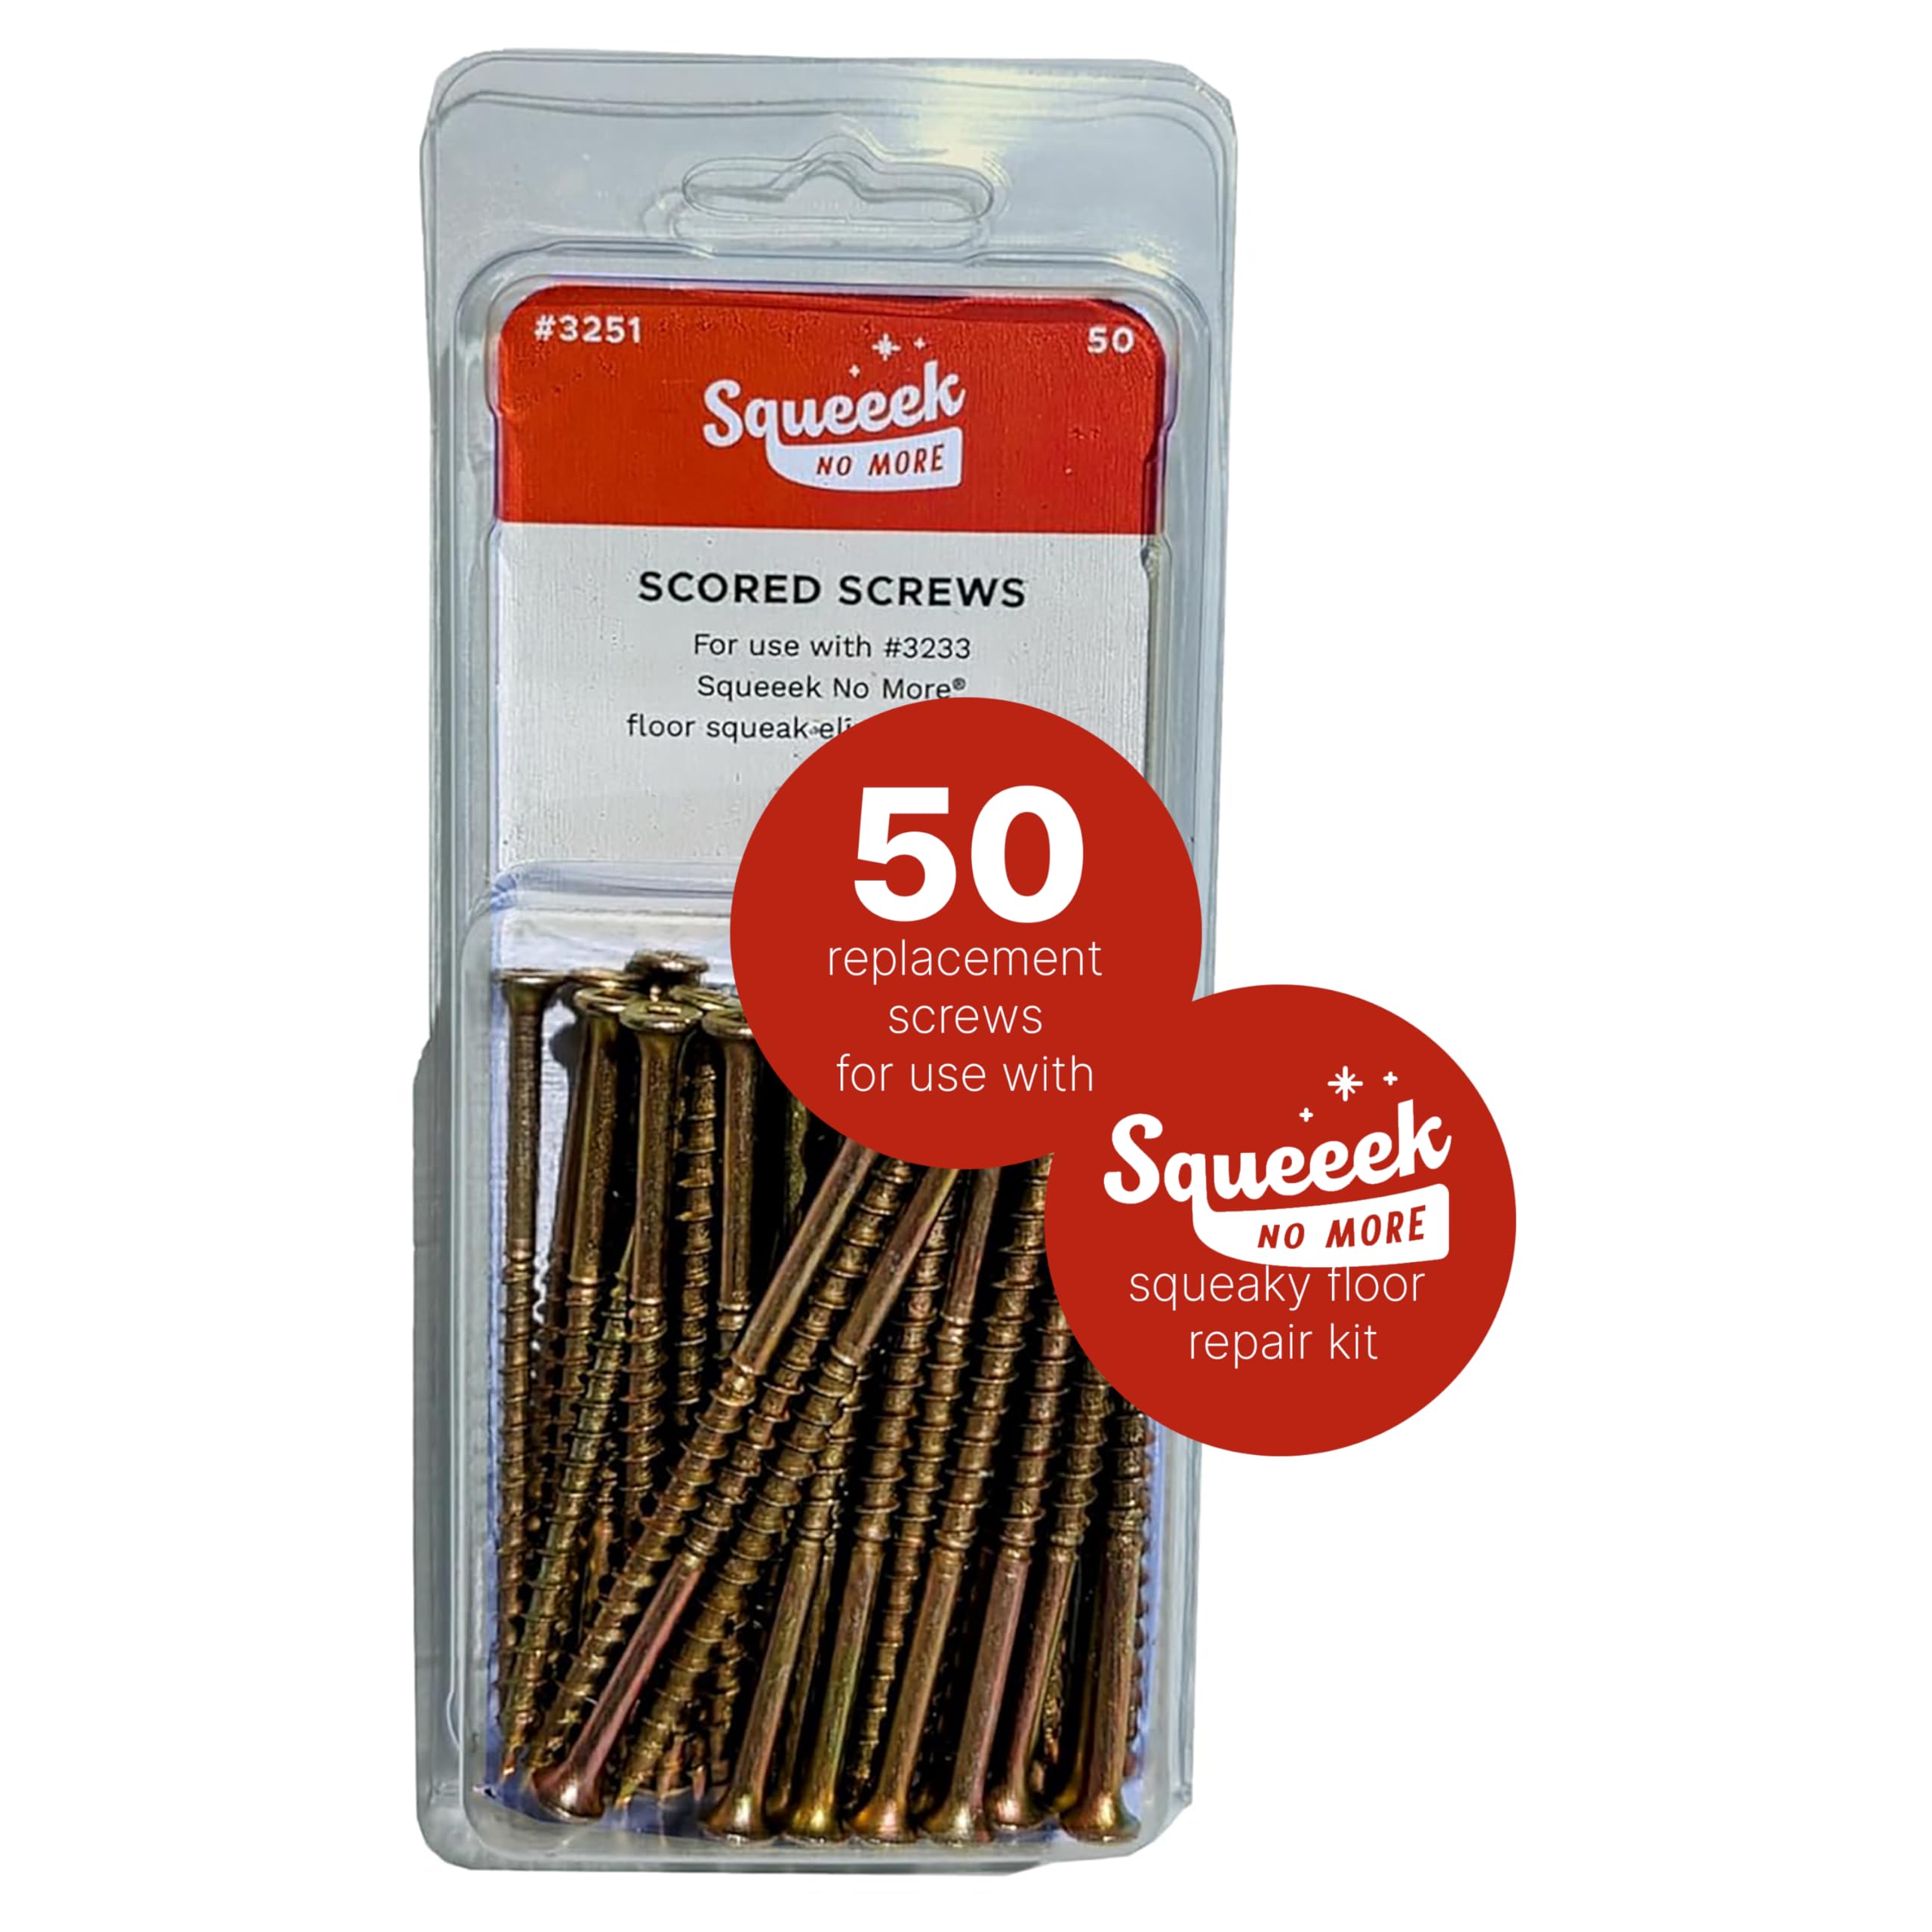
The O'BERRY ENTERPRISES 3251 Squeak Replacement Screw pack includes 50 high-strength alloy steel screws designed specifically for the Squeeeeek No More® Floor Squeak Repair Kit. Featuring a snap-off head for invisible repairs, these fully threaded screws secure flooring tightly to joists, eliminating annoying squeaks in carpeted and hardwood floors with durable, easy installation.


| ASIN | B000H5WV1Y |
| Brand | SQUEEEK NO MORE |
| Colour | Red |
| Generic Name | screw |
| Global Trade Identification Number | 00765806032517 |
| Head Style | Bugle |
| Head Type | Flat |
| Included Components | wood-screws |
| Item Dimensions LxWxH | 17.8 x 7.6 x 2.5 Centimeters |
| Item Weight | 299 g |
| Item dimensions L x W x H | 17.8 x 7.6 x 2.5 Centimeters |
| Item model number | 3251 |
| Manufacturer | Standard Plumbing Supply |
| Material | metal |
| Maximum Shear Strength | Approximately 250 MPa to 700 MPa (36,259 psi to 101,538 psi) |
| Metal Type | Alloy Steel |
| Net Quantity | 50.0 Count |
| Number of Pieces | 50 |
| Product Dimensions | 17.78 x 7.62 x 2.54 cm; 299.37 g |
| Size | Pack of 1 |
| Thread Class | 1A |
| Thread Coverage | Fully Threaded |
| Thread Style | Fully Threaded |
| UPC | 765806032517 |
G**O
I bought these Squeak No More screws, to continue trying to silence my noisy chipboard flooring, on my top landing, having previously bought the jig, with 50 screws. They have helped reduce the squeaks, but some still remain. Being 71, I need to visit my bathroom, during the night, and because it is otherwise quiet, the squeaks sound very loud. This system is no quick fix, and you obviously need to apply them to the adjacent areas, to improve the cure. Now that I have an extra 150 screws, I can try them on my adjacent carpeted floors, in the hope that I can stop having to tiptoe around, at night. Top Tip: Try to put the screws in at as much of an angle, as the jig will allow, which won’t be much, but I found this improved their effectiveness. I will try to post another review, when I have either succeeded, or failed; whichever is the case.
D**E
Worked perfectly !!
A**R
We live on the second floor of an old late 60's house in BC. Our master bedroom still has the original oak floors, and they squeak like crazy in many spots. This was especially bad in the winter when the furnace is working a lot and the wood is drier. Got this product and also ordered the extra 50 screws package (this only has 50, not 100). Took a little while to find the soft squeaky spots, then applied a screw right at the center of the loud spot and surrounded it with 4 additional screws about 1-2 inches away in each direction. This meant each spot took at least 5 screws to get the squeak out. so 100 screws took care of about 20 bad spots in 3 rooms. It doesn't entirely resolve the squeak but reduces it by a lot. Pre-drilling with 1/8 was required. I just drove them into the pre-drilled hole with an impact driver until the score was below the wood, then used the side-snapping tool to do all the screw heads (the original method didn't work well, but the side-snapper worked well)
T**.
Fantastic. Worked magic on my floors thankyou
D**E
A brilliant product to use and very,very easy. We had to have our new (to us) static caravan moved from one part of a site to another and sometimes things don't go to plan when you have a static uplifted!! It was put on to its new pitch and looked lovely but as soon as we went in the floor started creaking and grinding as the joists sometimes do when any caravan is moved! The site owner was kind enough to say that he would do it but it would take a little time so we decided to look around for something that would help us do it safely and quickly ourselves and these are what we found,O'BERRY ENTERPRISES 3251 Squeak Replacement Screws. It took my husband and myself less than two days to mark out the floor inside the caravan with chalk,this is done on the actual carpet,then my husband got under the caravan and together we were able to work out where the joists were. I then used a re-chargeable drill to drill in first screw just to make sure the chalk marks were in the right position before screwing them down through the carpet (yes you read it right) and you will know you hit the joist by the noise the drill makes (just like a hammer drill). As soon as you hit and go into the joist with the screw all that's left to do is use the small plastic tool to snap off the head of the screw itself with just a slight twist and ,believe it or not,you have no marks or anything on or coming through the carpet at all,just carry on doing that. So it took us not long at all,one inside one outside,a nice sunny day and (now) an absolutely lovely,quiet floor. Don't hesitate,they work and we recommend them to anyone (even our site owner).
Trustpilot
3 weeks ago
2 days ago