Some deliveries may take a little longer than usual due to regional shipping conditions.

DOWNLOAD THE APP


Customer Services
Copyright © 2025 Desertcart Holdings Limited
DOWNLOAD THE APP
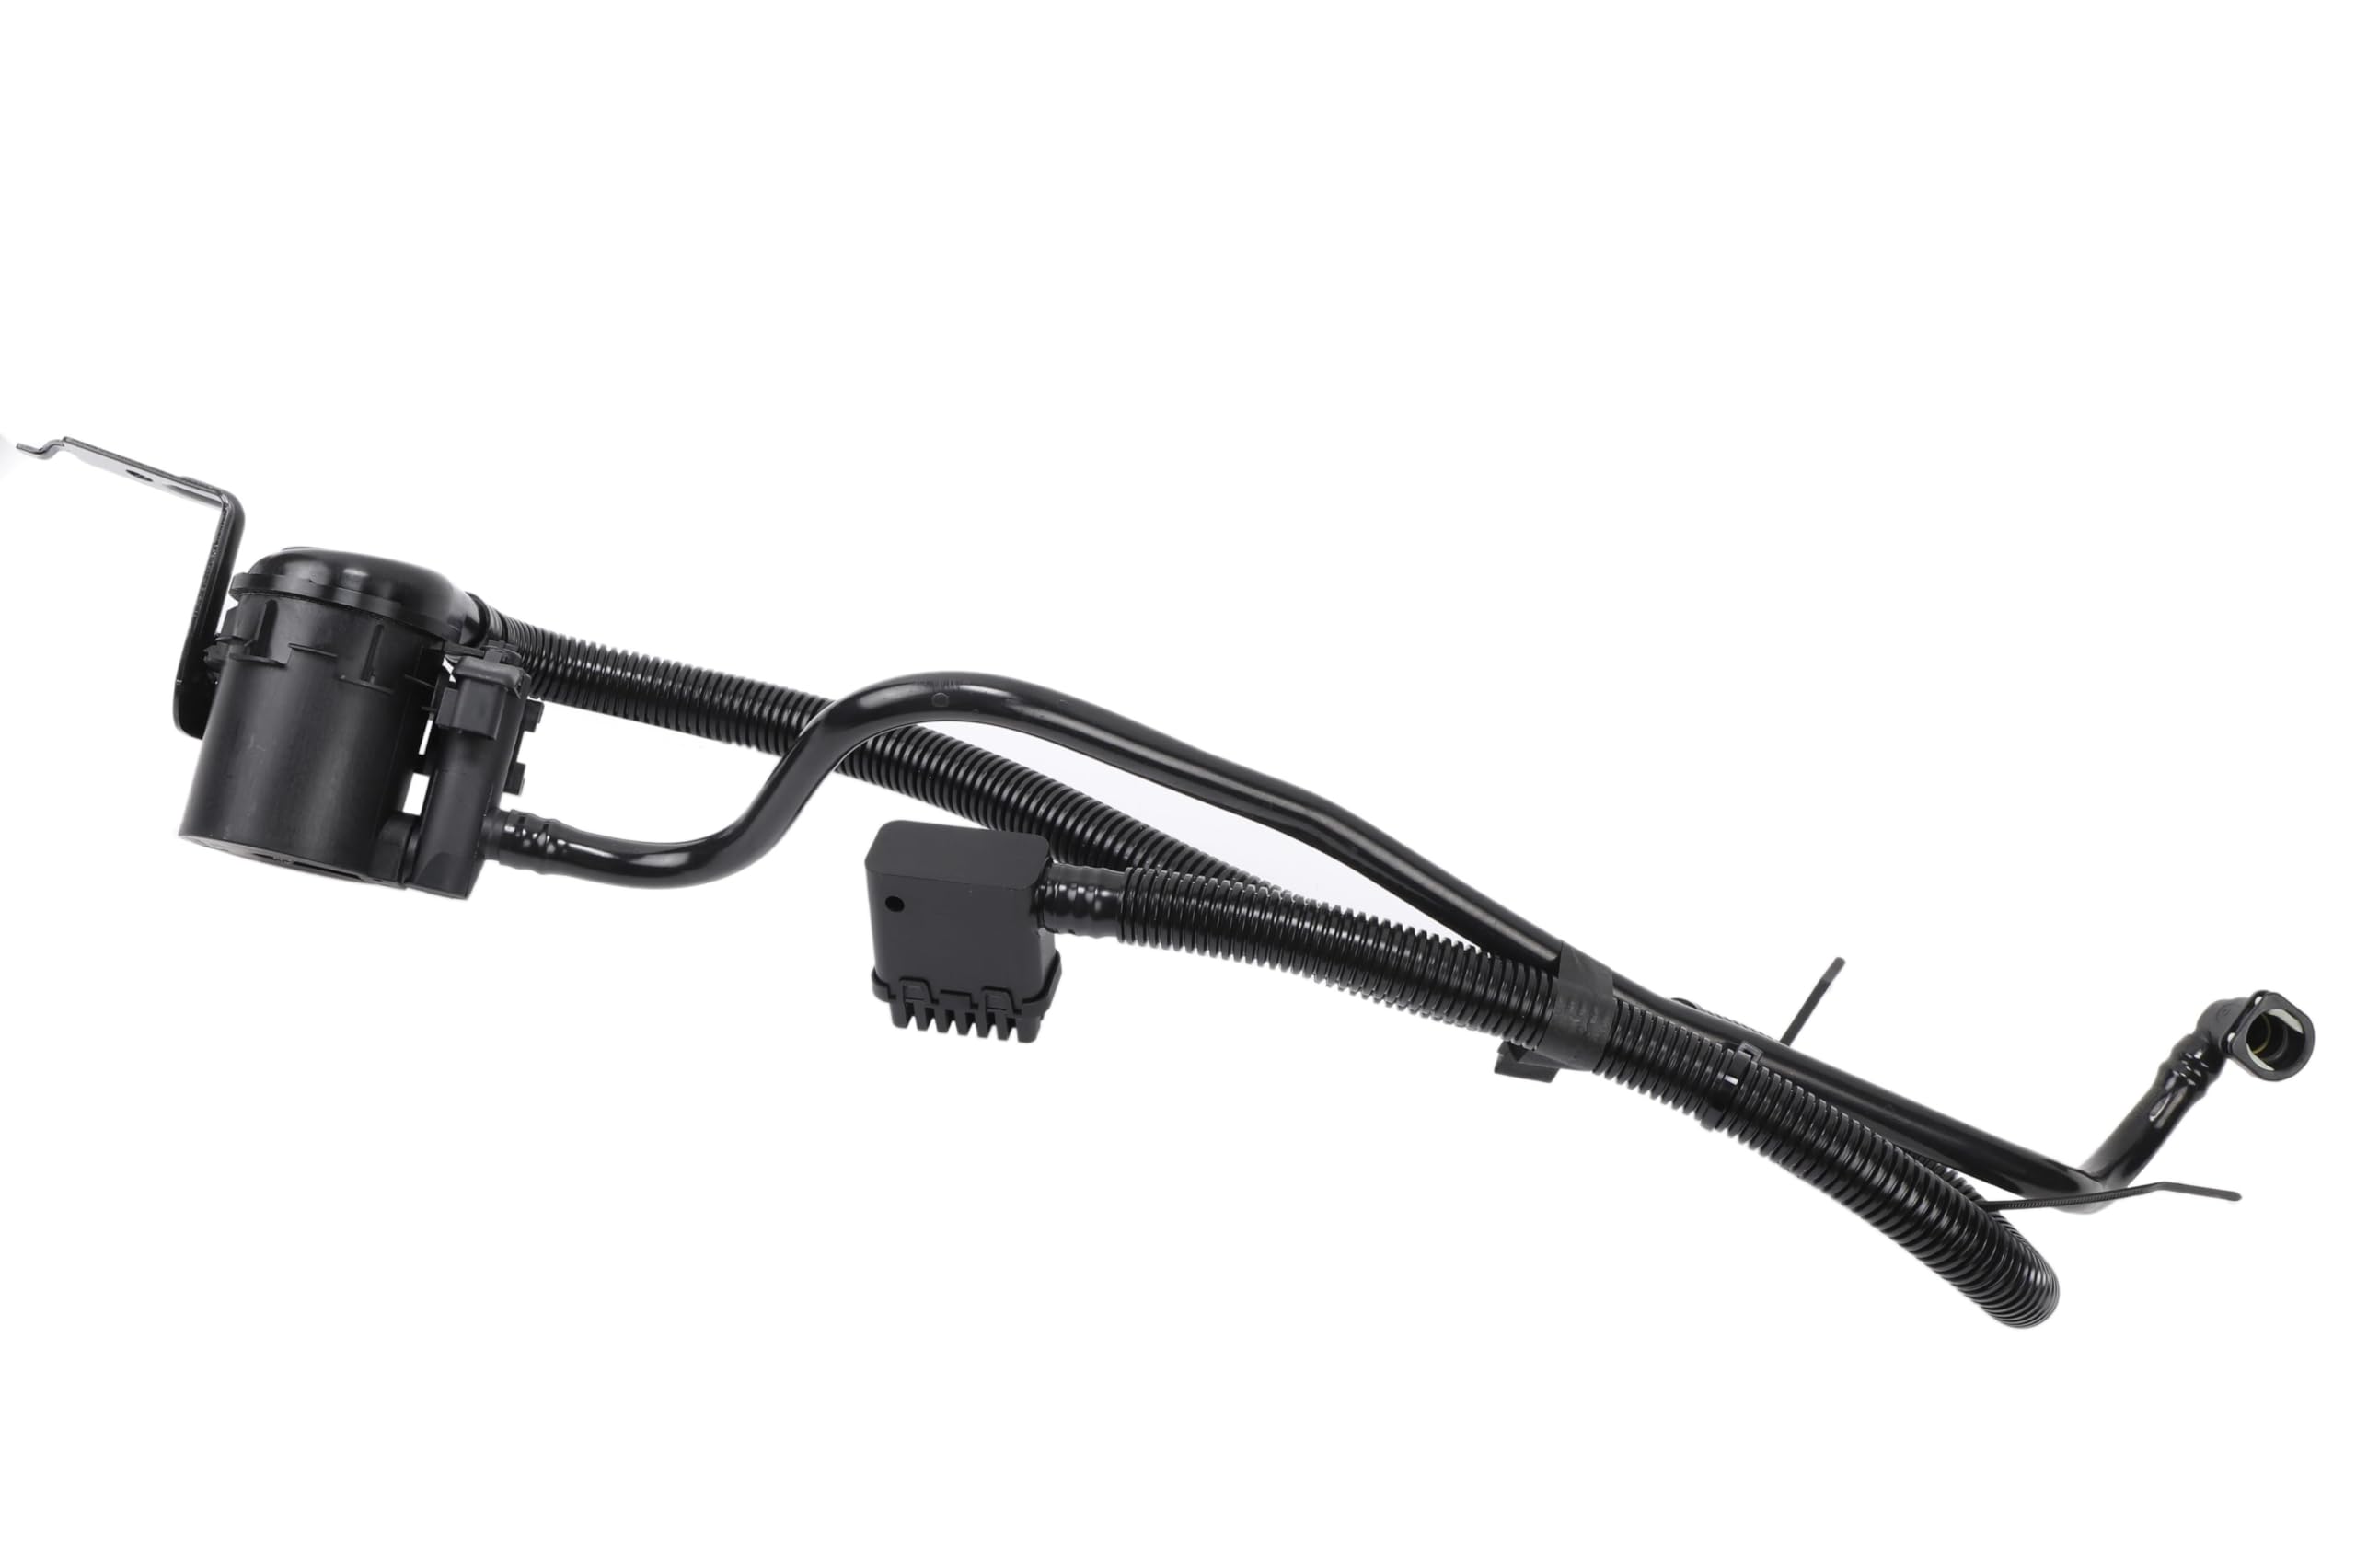
⚡ Upgrade your ride with GM Genuine Parts — precision engineered for peak performance!
The GM Genuine Parts 23481275 Vapor Canister Vent Valve is a GM-recommended OEM replacement part designed to restore your vehicle’s evaporative emission system. Manufactured to exact GM specifications, it includes a new steel bracket and hoses for a perfect fit and improved durability. This valve ensures proper venting of the vapor canister, helping to clear check engine codes like P0449. Easy to install with basic tools, it’s a trusted solution for maintaining your GM vehicle’s emission integrity and performance.


| ASIN | B00RW3A04E |
| Best Sellers Rank | #8,373 in Automotive ( See Top 100 in Automotive ) #4 in Automotive Replacement Emission Canister Purge Valves |
| Brand | GM GENUINE PARTS |
| Customer Reviews | 4.5 4.5 out of 5 stars (1,744) |
| Date First Available | January 6, 2015 |
| Is Discontinued By Manufacturer | No |
| Item Weight | 14.2 ounces |
| Item model number | 23481275 |
| Manufacturer | ACDelco |
| Manufacturer Part Number | 23481275 |
| OEM Part Number | 23481275 |
| Product Dimensions | 32 x 9.5 x 5 inches |
M**E
Factory OEM. Fit perfect and fixed my P0449 Code.
I have a 2009 Chevy Tahoe that issued a P0449 Code. I bought this and the ACDelco 19257603 plug adapter. This was very easy to change and took me about 1hr. It took 30 min to get the stupid spare tire off. It was stuck and I had to use a long screw driver to release the safety lock. This canister comes with a new steel bracket and all new hoses. I absolutely needed the ACDELCO 19257603 Adapter since this canister has the updated electrical plug. This is an updated canister. The hoses are shaped a bit different than the factory original. I had the route the stiff hose under the charcoal box then up instead of above it and then down. This was a non-issue but just wanted to make a note of it. The flexible breather hose fit fine and came with zip ties to fasten it to the frame. Also note that this will not fit the old steel bracket. The canister comes with a new bracket and I had to use it to get the canister to sit in the correct position. The old bracket will causes the canister to be installed incorrectly which will pinch the stiff pipe. The new bracket worked perfect and all the pipes fit as they should - use a 13mm wrench to remove the single bolt holding it on the frame.. Overall this was a very easy change and the only tools I needed was a 13mm wrench, flat screw driver, and wire cutters to cut the old zip ties, and a $10 code reader to reset the code.
N**S
Perfect fit, installs in an hour (after the spare tire is out). Cleared my CEL issue. It looks WAY harder than it is.
My 2009 GMC Yukon XL Denali had a check engine light, and the code indicated a bad vapor pump. Since the part is relatively inexpensive, and because it includes all the hoses, I bought this to replace the old one. Installation was a little rough because the rear undercarriage of an SUV with 175k miles is a dirty place. If you do this job, make sure you have safety classes. And a way to take a selfie after you're done, so that your wife will think you worked really hard. Watch which hose you're disconnecting from the canister. I wrestled with the wrong hose for a while. The correct hose came off easily. Do a youtube search for a good tutorial. I watched Brian Eslick from How to Automotive - he has a great one, although its for a 2007. DON'T cut off the zip ties that it comes with. They have a double-head, so they can be used to connect the vapor inlet tube to the filler neck. I discovered that my old hose that runs up next to the filler neck had worn through. The vapor pump probably sucked in all kinds of dirt through that, killing it. This new design has a protective cover over the tube, so that shouldn't be a problem in the future. The whole thing took about an hour, after I got the spare tire off and not including fighting with the wrong tube on the vapor canister. This is absolutely a DIY, in the driveway, after work and before dark kind of job. Just watch the video first, and hype up the job to your significant other that it will be REALLY difficult. So they appreciate it more. And just like that, the CEL light was gone.
M**.
Easy fix
Replacement part fit no problem
R**Z
If it doen't look identical to your OEM part, don't panic... it will work!
Did not match-up identical to the evap solenoid on my 07 suburban. Concept was all the same but the mount position to the hose in/out positions along with the small canister were all different from original. Functional it will install and work, but I feel that the hose that leads to the charcoal canister is not form fitted as well as the orginal. It feels as if its force to fit its position but it will connect and work. You do have to use the adapter plug and once all connected, the error code never comes back! FYI - this is what my oem part looked like... ACDelco 214-2341, problem was that it didn't come with the permanently attached hoses. One of the fittings were fore a slide on hose where as my OEM had a permanent press form fit hose which I could not remove & re -apply to this ACDelco 214-2341 part. So in a nut shell I just couldn't find the exact fit part that originally came off my truck , so when you come across the same situation with this ACDelco 23481275 part, don't panic... it will work.
H**R
Price is great for OEM and solved my problem!
08 Yukon Denali with 115K. Engine light originally came on with a P0496 code so I had dealer replace purge valve on top of engine. Light was off for about 2 months then back on with a small leak emissions code, so I replaced gas cap and cleared the code. Of course, as soon as the evap monitor returned to "ready" status and tested for leaks I received a large leak code along with P0449 vent valve malfunction code. I watched a couple of YouTube videos and realized I could handle this. Purchased a cheap creeper, ordered this updated part along with the required wiring harness adapter, installed it and cleared the code. It took about 3 weeks of driving for the evap monitor to return to "ready" status and test the system. That was one week ago and I have checked several times using my code reader and there are still no pending or fault codes, so I am going to ring the bell on this one! Here are some tips for ordering and installation: - As many have said, also order the ACDelco 19257603 jumper wiring harness. You will need it. - Lower spare tire and move it out of way to offer more room. I'm 5'10 and 175 lbs. Didn't need to jack vehicle up, but moving spare was necessary. - Use a creeper so you can more easily turn in awkward positions to disconnect/connect parts. - Wear safety goggles, cotton/plugs in ears and a cheap particle respirator (lots of debris will fall). - Search YouTube and watch videos, especially for pinching to release hose from charcoal canister. It's easy once you know how. - If you don't already have a code reader, get one so you can monitor/clear codes. Under $20 and you can keep it in your glove compartment. - After installing, evap monitor needs to test for leaks and it only does this after certain conditions are met (i.e., vehicle in cold mode, usually overnight, certain ambient temps and all sorts of other factors). You can monitor status of this with a code reader/scanner. If you haven't cleared the code after installation, light will remain on until test is complete and positive for no vapor leaks/system malfunctions. If you have cleared code, you are not in the "clear" until the evap system tests "ready" and there are NO CODES. For me this took 3 weeks of WI driving. If you still have a leak, assuming the new part is good and properly installed, it means another part of the system (purge valve, gas cap, charcoal canister, wiring, etc.) still needs to be addressed. Good luck and sorry for such a long review, but I hope it helps! For a DIYer, the price of this OEM part on Amazon is excellent!
R**N
Great product - fits perfectly - solve p0442 code
I bought this to solve the p0442 code I was getting on my Chevy Avalanche 5.3 FLEX. I first change the gas cap that can cause this code which is cheaper and easier. You want to rule the gas cap out first. In my case it did not fix the problem so I had to purchase this Vent Valve which is a common problem with this vehicle. It is relatively easy to change. The most difficult part is to lower and remove the spare tire from the truck, and dealing with all the dirt that fall in your face as you work under the truck. Wear goggles and\or hose off the dirt first <smile>. If you have not done this type of thing before, pay attention to the vacuum hose connector. You have to push in the plastic clip to remove or else you will have a hard time taking the old one off and brute force will break or crack the cannister nipple and put you in deeper trouble. Look closely at the new one first to see how it works and then take off the old one - it should slip off easy. The new bracket is shaped differently but still connect to the original bolt location. One more thing... You will need the Jumper Wire Harness - ACDelco 19257603 - BUY IT! You will thank me later.
R**R
Had to get an wire adapter
Didn’t fit on my 2010 Chevrolet suburban I have to get an adapter because the plug connector is diffent
L**N
2007 Chevrolet Avalanche - CEL Code P0455 Large Leak
Determined to resolve the CEL Code P0455 Large Leak, that plagues me through the summer months & inhibits remote start. Having thrown the engine purge valve & new gas cap at her without success, I resolved to tackle the other likely culprits. Thus I purchased the following: GM Genuine Parts 22963841 Vapor Canister GM Genuine Parts 23481275 Vapor Canister Vent Valve (Spare Vent Valve Solenoid Jumper Wiring Harness Connector 19257603) A simple job that took a fair while longer than it should have, as the spare wheel that wouldn't lower so after spraying with liberal amounts of WD40 & waiting it finally dropped to the ground. Thus I finally resumed the quest to track down the root cause of my P0455 Large & went in to replace the vent valve. Can you see the problem boys & girls in the pictures? Yes the hose between charcoal canister & vent valve was totally gone (except for the right angled hose connector that remained attached to the canister). I replaced the canister vent valve, very quickly, using the new pigtail connector, though the older unit had the same adaptor cable & I kept the vapor canister for another day or just in case of future problems. It worked out cheaper for me to buy the genuine parts & get them shipped to Montana for my pickup, than it did to source clone parts &\or get a garage to perform the repair in Canada. Total time best part of 4 hours for what should have been a very easy job (Allowing for a half dead hand), 90 minutes maximum would be a safe number, bonus points I can lower my spare tire & have resolved to check that each Spring & Fall from hence.
Trustpilot
1 month ago
3 weeks ago