Buy anything from 5,000+ international stores. One checkout price. No surprise fees. Join 2M+ shoppers on Desertcart.
Desertcart purchases this item on your behalf and handles shipping, customs, and support to Nicaragua.
✨ Unlock the Universe in Minutes with NexStar 130SLT 🔭
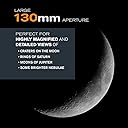
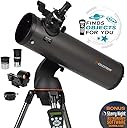
The Celestron NexStar 130SLT is a computerized Newtonian reflector telescope featuring a 130mm aperture that gathers 30% more light than smaller models, enabling detailed views of planets, the Moon, and deep sky objects. It boasts a database of over 40,000 celestial objects and uses SkyAlign technology for rapid, user-friendly setup. Its compact, portable design with a pre-assembled steel tripod makes it ideal for both beginners and families seeking immersive stargazing experiences. Includes free Starry Night software for enhanced sky exploration.


| ASIN | B0007UQNNQ |
| Best Sellers Rank | 14,798 in Electronics & Photo ( See Top 100 in Electronics & Photo ) 41 in Telescopes |
| Box Contents | 20mm and 9mm eyepiece, Accessory Tray, NexStar+ Hand Control, Optical Tube, Single Fork Arm Mount and Tripod, Star Diagonal, StarPointer™ red dot finderscope |
| Brand | Celestron |
| Brand Name | Celestron |
| Coating | StarBright XLT |
| Compatible Devices | Computer |
| Country of Origin | China |
| Customer Reviews | 4.4 out of 5 stars 3,479 Reviews |
| Dawes Limit | 0.89 Arc Sec |
| Exit Pupil Diameter | 26 Millimeters |
| Eye Piece Lens Description | Plossl |
| Eye piece lens description | Plossl |
| Field Of View | 6.3 Inches |
| Finderscope | Built-on StarPointer™ red dot finderscope |
| Focal Length Description | 325 millimeters |
| Focus Type | Manual Focus |
| Global Trade Identification Number | 00050234311458 |
| Item Dimensions D x W x H | 20.3D x 30.5W x 71.1H centimetres |
| Item Weight | 11.4 Pounds |
| Manufacturer | Celestron |
| Manufacturer Part Number | 31145 |
| Model Name | NexStar 130 SLT Newtonian |
| Model Number | 31145 |
| Model name | NexStar 130 SLT Newtonian |
| Mount | Altazimuth Mount |
| Number of Batteries | 1 Lithium Metal batteries required. (included) |
| Objective Lens Diameter | 130 Millimetres |
| Objective lens diameter | 130 Millimetres |
| Optical tube length | 635 Millimetres |
| Optical-Tube Length | 635 Millimetres |
| Power Source | Battery Powered |
| Product Features | Portable |
| Telescope mount description | Altazimuth Mount |
| UPC | 050234311458 |
| Unit Count | 1.0 count |
| Zoom Ratio | 20 |
A**R
Excellent starter telescope
As a former professional astronomer and user of other amateur telescopes I bought this to try and introduce my children to observing and am mainly comparing this to a 6 inch Newtonian reflector with an equatorial mount which has served me well in the past, but is very large and heavy to set up, so an easier alternative was called for. The first night I used this I was hampered by cloud, so could only do a basic setup and some initial lunar observing, but I was pleased to find that this was easy to set up in a short period of time, using the quick setup guide. The lunar views I got were excellent and my kids (and even my wife!) were enthralled with the first views of the moon that we obtained. The second night, although cloud was again an issue, I managed to set the scope up fully. the set up was easy, following the instructions, although it is sometimes tricky to remember that the arrow buttons are only used for controlling the movements of the scope from the handset and not navigating the menus, however they were largely self-explanatory and made the initial setup easy. I would advise using a custom site for alignment using a smartphone with GPS (almost ubiquitous these days) to obtain the precise location, just remember you will need the location in degrees, minute and seconds of arc, rather than decimal. This is quite easy to find with a quick internet search on a smartphone however. Exact times from a reliable source, such as a synced smartphone is also required, along with your time zone. Once these are in you can choose to align the scope using any three bright stars or other celestial objects (moon or planets), simply align the object in the finder scope, then centralise in the eyepiece and align using the handset. This was done in minimal time, even with poor visibility due to cloud and the computer accurately aligned the scope at the first attempt with no need for firmware updates or similar for the handset. Following alignment I used the sky tour to find appropriate objects and after checking that the sky model was correct (it was able to find the moon without difficulty in the solar system mode) I used the handset to move to Andromeda, which was visible as a fuzzy patch, despite poor visibility and quite bad light pollution. The tracking seems to work fairly well and will keep an object in view for a significant amount of time (quite sufficient for real-time observing using the eyepiece), but did exhibit some element of drift, so would not be suitable for deep sky astrophotography, but this is to be expected with an alt-azimuth mount, as compared to an equatorial setup. Unfortunately, the sky conditions deteriorated further preventing any more testing on other objects, but overall this telescope is easy to set up and provides a quick means of finding astronomical objects. As a starter scope at a reasonable price it would seem that it is difficult to beat. In terms of power, I did buy the external battery pack which allows extended observing and this seems to be the best way to power the scope as while using the internal 8xAA batteries would avoid any problems with cord entanglement, the lack of battery life may limit it without a substantial supply. Cord length and wrapping would be even more of an issue with a mains powered supply and could be problematic for anything more than a small distance outside. The scope does need power to operate though and cannot really be operated without it, which is definitely a downside if you were wanting the use it in an unpowered alt-azimuth mode. Overall, this seems to provide a good observing experience for the aperture and price and is highly recommended for a beginner. Obviously, you could get a larger aperture without the goto function for the same price, but this really wins on convenience. I look forward to may happy nights observing with my kids in the near future.
A**R
Good telescope and leaves you wanting more
I'm not professional, these are just my impressions. WARNING 1: this might be a begining of an expensive hobby! You will likely want accessories, filters, eyepieces, and maybe larger aperture for deep sky. Search for what you can see with a telescope (especially if you're interested in Nebulae/galaxies) if it's you first one to manage expectations. WARNING 2: you won't see details and colours you see in pictures online including mine (except maybe for Moon). Cameras are far more sensitive and have longer exposures than our eyes. Search Orion Nebula or M81 through a 5, 8, 10 inch telescope for example to have an idea and compare with pictures. Overall, I'm very happy with the telescope, optics seem quite good without noticeable chromatic aberrations, tracking is OK with options to fine-tune during use. After using this, I'm curious to try something with a larger aperture to see more details in deep sky, but it doesn't mean I'm enjoying this telescope any less. For me it hits a good balance of power, ease of use, and portability. Though 8-inch aperture ones would probably last you much longer if you're going to get into the hobby more seriously, those are much more expensive and heavy. You are paying a premium for goto functionality and compact design compared to some other 5-inch options, but I found goto to be very helpful especially at first. This vs a Dobsonian: Observing with a tripod is so much easier especially when what you're looking at is low. Optical tube is much more compact compared to Dob of comparable aperture and f-ratio, but later would probably be cheaper. As far as I can tell, a typical Newtonian reflector would be far less tolerant to collimation issues than this design. Learning with this is certainly easier. If it's your first telescope - be prepared you won't see the colours and details you see in pictures online. Those are captured with cameras with longer exposures and higher sensitivity than human eyes and are heavily processed. This being said, I got this picture of Orion Nebula with an old unmodified DSLR through this telescope in a single exposure, no stacking or additional hardware. What can you see? Moon - amazing! Very bright, very sharp clear small details, no weird colours. Planets - they appear about small pea-sized, rings of Saturn are clearly visible, as well as bands of Jupiter (in colour). You can get them bigger with additional eyepieces or Barlow lenses, but with ones I got (admittedly not the highest quality) I couldn't see more details - same thing just bigger and a little blurrier. Deep sky objects - probably the coolest thing to photograph, but visually seeing it for the first time it's amazing how dim those are in general. I could see Orion Nebula and some other DSOs. In Orion Nebula I could see general shape, but no colour when observing from Peak District. You can probably see more from a darker site, but I haven't tested it. Overall the aperture is considered small for visual DSO observation, but I could see something. Moon, snow, atmospheric conditions (e.g. turbulent air) will all affect your observation. Relative positions of earth to other planet also affects the details you see. Mount, focuser etc: I've read complaints about the mount not being sturdy enough online. It's definitely more shaky than a heavy Dobsonian, but for me it's perfectly useable. You do need to wait a couple seconds after adjusting focus for it to get stable, but you absolutely can get clear view and pictures after that. GoTo depends on how good your alignment is and has couple clever features - there is a "precision goto" option in the menu where it first navigates to nearby easy to see object for you to correct error and then it goes to actual target. Mount doesn't fold flat with optical tube as SE model does. The tripod is a bit bigger than a typical photo tripod when folded. If you're thinking of getting this and using mount for later optical tube upgrades, search for mount limits - you probably won't put much more onto it. I've read online people ignoring limits and putting 6se and even 8se on it, but it will be even shakier and I have no idea how long it will last if you did it and I doubt warranty will cover it. You need to align red dot finder and the telescope before observation, otherwise finding anything is very difficult. The mount is Alt-Az, as opposed to equatorial if it makes difference for you.
A**L
Brilliant little scope
This telescope is my first, and a great way to get into astronomy, have had it a couple of months now. And it is so much fun, it was so simple to get going, I had it up and running in ten mins on my first go!!,the planets and moon through this are great, Jupiter is my fave, looks like a white pea with a couple of reddish lines going through it, and 4to7little dots next to it(moons), don't sound great but remember this is a small low priced telescope(great value for the money),you are not gonna see loads with this. But, it will teach you so much about the night sky,and it's really portable, i carry it in a big bag, and it takes only ten minutes to get it out and running, the goto is not 100percent accurate, but it points you in the right direction, and your own brain works out the rest( makes you feel useful), the eye pieces you get are quite good, get a Barlow and it's all you need, I bought some really expensive ones, but on the intention of a much bigger scope in a year or 2, they don't make a great deal of difference with this low powered scope, it really is a great learning tool tho, and I'll never get rid of it, as it will great for my 2 year old in a few years time .And highly recommend it as a beginners only telescope
J**N
A good starter telescope
Apologies for length of this review, but based on 4 months solid use and all we have experienced. This model was purchased at Christmas as a first telescope for complete novices, largely on the strength of the computer governed motorised Go To function and the good size of the mirror at just over 5 inches. The Go To makes it easier to locate objects, and the size of the mirror means that faint objects well beyond the capacity of the naked eye can be seen. It also provides some basic detail of the the planet Jupiter. The kit arrives with everything you need bar batteries to power the motors (8 AAs not supplied). No complex assembly of parts is needed. The tripod folds out and a plastic tray for odds and ends sits between the three legs, also providing some bracing of the legs. The motor and telescope support arm has some weight but is easily managed, locating on the top of the tripod and secured by screwing up a large plastic nut by hand under the tripod head. The optical tube assembly, OTA, slides into a place locating a metal bar in a dovetail fixing on the support arm. It is secured by tightening a nut by hand, though the OTA needs to be cupped in the arms underneath to lift it fully in place to get the nut tight enough to take out slack and make the connection solid, which is essential. Not the best of design but it works ok with some patience. Once fixed you probably won't have to undo it again. The direction finder slides into a dovetail on the OTA. This is a good design. It contains no lenses. A red LED (not laser so safe to look at) shines against a piece of glass in the finder as a dot with adjustable brightness. The telescope is moved until the red dot is directly over the object of interest. In theory it should then be in the middle of the field of view of the telescope but the finder will more than likely need to be aligned. It is easier to point the telescope during the day at something like a distant chimney, centring the object in the telescope viewfinder by eye and then aligning the finder to match. Two thumb screws shift the pointing direction of the finder left/right and up/down if necessary. In our case there was insufficient travel on the left right adjuster and this required undoing the screws fixing the finder to the OTA with a pozi screwdriver until JUST loose (there are nuts inside the OTA which you don't want to come off and hit the mirror). Then shift the finder. The optics all need to be lined up and should come perfect in the box. They are tested by looking out of focus at any star. You should see perfectly circular haloes. Luckily we did. If not, the telescope needs to be 'collimated', requiring a tool not supplied - see You tube videos. The eyepiece holder fits in the focuser tube and has an adapter to take 2inch eyepieces (which is useful but unlikely to be needed, most eyepieces and accessories at this level being 1.25 inches in diameter). The focuser is ready assembled and an eyepiece is inserted in the tube and two thumb screws tightened to hold it in place. Primitive but seemingly a universal means of fixing whatever you pay for a telescope. The controller hand set plugs in a clearly marked socket. There is another socket for a mains adapter (not supplied) or a separate rechargeable 12v battery pack, a so called "tank" available for around £55 incorporating a torch. The scope will move up and down by hand but not turn sideways without the motor on so power is an essential. Batteries don't last long so are expensive. We found we had an AC/DC adapter on some other equipment providing 12 volts DC at a sufficient max current (2amps is fine) and we used that with an extension lead in the garden. You soon realise though that you need to fork out for the portable battery tank for practical and safety reasons. The big selling point of the scope is the Go To function and there are a number of options for using this. The general approach is to point the telescope at a star or stars (planets can also be used), using the motor to move the scope to another star. The more names of stars you know the quicker it all is but if you know none at all it's fine. The telescope needs to be pointed at three objects in succession reasonably well spaced in the sky and at different altitudes. The computer should then work out how it is aligned and then will go automatically to any of the objects in its database just by selecting them on the handset. We got this alignment to work on the second attempt but it is not foolproof. You need to enter the time on the handset accurate to the second preferably before you start. It is rather annoying that the handset does not have a clock built in so this needs to be done every time the scope is switched on. You also need to enter your latitude and longitude but getting this spot on is not so essential. You can also use the pre programmed locations in the handset though there are only four or five for the UK. In our case London is good enough though we are 25 miles from the centre. But it is simple enough to put your post code in the internet or consult a sat nav to get the required figures accurately. It only needs to be done once and the handset retains the info. The scope will also track objects once set up so they are kept in the field of view with little adjustment using the hand set. So on to using the scope! What do you see. Forget the Hubble telescope pictures. Using the supplied 9 mm eyepiece (72times magnification) you will be easily able to see four moons of Jupiter as dots, and on a good viewing day, two weather bands as stripes on the surface of the planet showing as a small disk. It is possible to see galaxies as white smudges, very hard to find without the Go To so it comes into its own. The bigger star clusters and nebulae are the forte of this telescope and one can spend ages staring at them. The moon craters will have you going "wow" too. Two issues are relevant. One. The supplied eyepieces are very budget and while it is not essential it seems pointless to buy a telescope at this price and optical quality and not use its full potential. In other words be prepared to spend another £100 or more to get some good eyepieces. You can pay over £500 each ! but we chose the Celestron x-cel lx at around £65 each, which we find are very good, being brighter with better contrast and giving a much wider field of view that makes viewing far less tiring not having to squint. These lenses give real wow moments when you first view say the nebula in Orion M42 (dial it up in the handset to get there) or the Pleiades. Two. The focuser has to be the worst piece of engineering ever, hence four stars and if it was a separate item two stars. Shame on Celestron. The tube with the eyepiece moves on a gear rack to focus and has enormous play. The mechanism is lubricated with very viscous gunk that makes it hard to turn the focusing knob. We find it is best to focus by turning the knob quite quickly from out of focus through focus to out of focus again and then coming half way back to get pin point sharpness. This is undoubtedly an acquired skill but made much harder by the cheap engineering. Some adjustment is possible, not described in the hand book (which is generally useful and in proper english if somehow rather old fashioned - download off the Celestron site to get more insight about using the scope before purchase). Two small set screws sit either side of the focuser locking screw and can be tightened using a small Allen key. This gets rid of most of the play but you have only to use a proper two speed focuser to realise just how poor the one on the 130 is. But don't let this put you off at all. Of course you expect better at the price, but again focusing is an art worth developing as for one thing, touch the focuser and the magnified image in the eyepiece will dance about regardless of how good the focuser is. You can of course easily pay £5000 for a sturdy mount! Make the adjustments to the focuser and take the design limitations as part of the fun. Thirdly, be prepared that the Go To is generally a bit out due to the gears and motor as well as any errors in setting up. Use the low power 24mm eyepiece first to check where you are. This may sound frustrating but you rapidly discover that a big part of the fun is hunting the objects and developing the skills to see faint things. Can you take photos of what you see. £25 will get you a clamp to fix any holiday snaps point and shoot digital camera to your eyepiece and it works remarkably well though. Use the self timer to avoid shake when you press the shutter button. Fiddly to set up but download free software like GIMP (free photoshop equivalent) to bring up the levels and what looks like three white dots turns into a nebula. We also bought a very modest CMOS webcam and using the supplied software produced a very detailed photo of Jupiter including red spot after half a dozen attempts and observing sessions in the back garden. If you have a DSLR you can take off the lens and connect to the telescope using connectors for around £20 and take some remarkable long exposure shots, though you are limited by the mount that results in objects turning in the field of view due to the rotation of the earth. (An equatorial mount is needed and the 130 slt cannot be easily adapted). In conclusion, use the vast resources of the internet to find out what to see each month. You Tube videos are a really useful source of information and expertise not least on astro photography. We were able to see the supernova that had emerged the previous week in M82 and which is gone in a few more weeks. These happen at a rate of about once every thirty years per galaxy so you can be party to some special events with this equipment. This telescope isn't the best of course and it could be better. But it has excellent optics and the ability to put you in awe of the universe. Prepare to spend more money to maximise the initial investment. Observing as a family is great fun - let me have a look, let me have a look! This telescope is recognised as a very good one and no one would think you had wasted your money on it. If you decide to join a club first and see whether you get the bug, if you did, almost certainly you would end up saving up and paying two or three times the cost of this kit, but in the end it might be cheaper. Highly recommended, strangely as much for the flaws which add a challenge, as for the good. I have now moved on to using a DSLR and you can get good results, see M81/M82 galaxies image
F**L
Excellent choice for the adult beginner.
After spending a number of decades as a backyard astronomer using binoculars, I have finally taken the plunge and bought a telescope. So what are my thoughts after 7 clear nights observing? Well firstly if you are thinking of doing the same DO IT. This telescope is good value for money. The instructions to put it together are short, clear and simple. It arrived on time and was very well packaged in 3 (yes 3) boxes plus the obligatory polystyrene and bubble wrap. Once put together my telescope now lives on its tripod and is easily portable by an over 60 year old. As a complete telescope beginner, it got me up and running immediately. - Except that unlike the description there were not batteries supplied - however having an outdoor power supply, I had ordered the power adaptor. The finderscope once aligned (alignment was easy) is very helpful. The two lenses supplied give good views compared to my hand held ancient but very good 16x60 binoculars which I am still using really as a wide angle view. - largely because of my hand shake when holding the bins... However I am looking to upgrade the lenses as quickly as money allows... The telescope is not however completely removed from vibration and t movement, but is much better if the tripod is not extended fully. However wind will wobble it as will human interference... annoying. So after a few sessions - as a total telescope beginner - largely because of cloudy skies or semi cloudy (rather annoying) skies what have I seen/was impressed with using only the lenses supplied (which most reviews suggest are not the best)? 1. The telescope will seperate Saturn and the rings - just - using the lenses provided. 2. Jupiter and the 4 moons look similar to a binocular view, but sharper and some banding on Jupiter can be seen. 3. The moon (advise you to get a moon filter) is stunning. 4. Views of clusters such as the Sword Handle/double cluster in Perseus, the Hyades, the Pleides, the Leaping Minnow in Auriga are good. 5. Scanning through constellations such as Cygnus, Cepheus, Cassiopeia similar to viewing the Milky Way through binoculars has been fun. 6. Binary stars - Albeiro in Cygnus, 30/31 Cygni, Epsilon Lyrae have been good. Again only with the lenses supplied, what have been disappointments? a. M31 - but also not great in binoculars. b. M27, M57, but I suspect they might be better with better lenses. c. Annoying having to re focus when you change lenses. (looking to get the Baader zoom asap) And what simple errors have I made? i. Not always waiting for my eyes to become accustomed to the dark. ii. Expecting to find things in the 9mm lense first - much easier to start with the wide angle 25mm. iii. Making sure that the telescope does not get stuck on the tripod when viewing objects nearly overhead. iv Assuming that everything will look better at a higher magnification - it doesn't. v. Standing up to observe using the telescope - does my back in - so I am now using an adjustable stool... Overall a good purchase and I am very pleased with it... However I can see that like the binoculars it will become addictive and will "demand" more money for lenses etc. etc...
N**5
Faulty, no customer support, and Linux is not compatible
Would be a great telescope - if it worked. Initial set up was great. The next night the up and down directional buttons weren't working, left and right were fine. I ordered a celestron power adapter as I read it could be to do with not enough power (even though the 8 batteries I put in were brand new). Adapter came the next day, but still no up and down movement. After googling cause there was nothing in the instruction manual to help with the issue, I factory reset the hand controller. Still didn't resolve the issue. I then removed the scope to try the mount as someone had suggest, and still no up and down movement. I have filled out the support ticket for technical support - no response. I have emailed Celestron directly - no response. I have just messaged them via their Facebook page but I'm not holding my breath. Also it states that apart from the operating systems listed, others should work although untested. LINUX DOES NOT. So anyone with Linux (chromebook) can not update/download any firmware or drivers. Very disappointed with customer support and its looking like the telescope will be returned.
S**S
3 months in - I love it!
This review is for the NexStar 130 SLT specifically. As a complete novice to astronomy - I took a bit of a gamble, set myself a budget and decided I'd get the best telescope I could for the money that I had. The fact it come on a mount which can automatically identify and target points of interest in the sky was a bonus for me also. Setting up: I personally found it incredibly easy to set up. Everything fit in place without any parts that felt like they were an ill fit. The mount has a spirit level measurement thing on the top and because this mount tracks things in space, it is important to make sure you level the mount out perfectly to get the most out of your experience. The 'Star Align' function is awesome, simply use the handset to point the telescope at 3 bright objects in the sky, wait for it to confirm that it's identified what those 3 objects are and then you can select from a rather comprehensive list of items and the telescope will move and point where the selected object is. Really is easy! There are other methods of setting up the alignment but for out of the box speed, I found this to be the fastest. What can you see? Well, I purchased a 2x Barlow and looked up at the moon using a 9x lens. I spent about an hour viewing the various craters and scarred surface. To me, the optics appear really good. I didn't notice any issues with viewing things. I'm sure more seasoned astronomers will be able to comment about the pros and cons of this telescope but for a beginner it certainly impressed me massively. I then put a 6x lens in (lower the number, the higher the magnification but at a trade off with field of vision...I think?) and pointed the telescope at a bright star in the sky. Yeah - it wasn't a star, it was Jupiter! I could actually see the 2 orange/red rings of the planet as I looked through the eye piece. Yes it was small but I could definitely make out it was Jupiter. I was highly impressed. Overall, as a novice to this field, I love my telescope. I've barely scratched the surface of what I can view but I really look forward to looking up at the night sky (when the cloud goes!). For me, it feels well made, gives nice views and the options for using the automatic finder function is really useful too.
T**R
... lot of time researching scopes as I wanted a good quality scope without the hefty pricetag
I spent a lot of time researching scopes as I wanted a good quality scope without the hefty pricetag, budget was set at £400 so the NexStar 130 SLT was bang on for this. Package arrived and was setup easily in 20mins, only had to wait for nightfall to really put it through its paces. Also purchased a 2xbarlow and other camera fittings as I hoped to get some good photographs using a Nikon 3200. It was a clear night that evening with a half moon so we setup in the garden and I was immediately impressed with the quality, both through the eyepice and then on the laptop through the camera. I have attached the best pic from that night and also another pic from a few days later and you can really see the detail level you can achieve with this scope. I did manage to get some pics of Jupiter with 6 of its moons around it but this was just with the 2xbarlow and 25mm eyepiece. When looking through with the 9mm and 2xbarlow you could just make out the brown gradients of Jupiter. I couldn't get the camera and the 9mm connected to be able to take that pic, rookie mistake at the time but will be better prepared next time. The motor and auto find mechanism are quite good and we were able to track Jupiter for ages without it leaving the eyepiece, will try some more deep sky objects once the skies clear up. Overall I am very happy with the purchase and look forward to using this scope for many years to come, the kids are knocking great craic out of it too so I'm sure it will be passed on to them eventually.
N**A
المنتج يتميز عن الفئات الاقل باظهار الكواكب بشكل اوضح
المنتج رائع ومثالي للفئه الهاوية للتبع الكواكب النجوم مع اخذ الاعتبار بامتلاك عدسات مناسبه اضافيه
R**N
Lazer ile istediğiniz yıldızı işaretleyin
Ay izlenimi çok iyi kusursuz gösterim yıldız haritanı varsa neredeyse tüm yıldızları görebiliorsunuz jupiter ve uydularını net görebilirsiniz zoom yapmanız gerekiyor beğendim efso bişi
B**N
An Excellent Starter Scope!!
Last week I received my NexStar 130 SLT. I made the decision to buy this scope based almost entirely on the recommendations of reviewers both here on Amazon and elsewhere. This is my first telescope, and I will say will say up front that I am completely happy with this scope! Regarding the negative reviews, I can sympathize that in some cases a truly defective article can arrive. For many, I would suspect that the issues encountered were largely of their own making. While in the main, this scope is relatively simple to set up and use, it still helps to have at least a modicum of technical skill (a healthy dose of common sense will help too!). The evening I received the scope (15 July) I set it up on my deck. Yes, not the most stable of platform, but I live in a dense neighborhood with lots of obstructions and murderous light pollution. The star alignment, using the 3-star "Star Align" process, took me two attempts. I blame my ineptitude with the use of an eyepiece and not having stars truly centered in the field of view for this. Regarding this, I think an eyepiece with a crosshair would be excellent for performing these alignments. (Another night I had multiple failures. This turned out to be related to the incorrect time, which was off by a few hours. The system will apparently remember the last values you entered. Be advised, they will not update and will be incorrect. Check your time and date each time you power up the system! (Many complain that the system does not retain the time once it is entered. I would venture a guess here as to why. The simple truth is that it would drift off of "real" time within a very short matter of time. Maybe adding the optional GPS module would fix this problem, but the internal NexStar clock is simply freewheeling and will inevitably be off the longer it ran on its own. Having to re-enter it each time you power up ensures that time is not an issue during the alignment procedure. Imagine your frustration if you took tons of time aligning each star in your eyepiece, and despite your best efforts the system would not align? Re-entering the time alleviates this factor, assuming you enter it correctly!) For my location, I simply plotted my deck in Google Earth and wrote down the coordinates. This seems to have enough fidelity for the star alignment to work. Once I had the telescope aligned I picked a random bright object in the southern sky to examine. Imagine my surprise when the first celestial body I have ever viewed through a telescope turned out to be Saturn! Using the provided 9mm eyepiece, the rings were clearly visible. I had not yet received my collimation eyepiece, so I was worried that it might need an adjustment. No adjustment necessary on my scope at this time! I am looking forward to viewing through higher-quality optics though. Regarding the stability issues that many have commented about. Yes, images do move about quite easily, especially on my wooden deck. I have not yet weighted the tripod or gotten a set of the damping pads. I will say that image stabilization is not completely unbearable on my scope. In just a couple of seconds after making a focusing or alignment adjustment, images became still enough to view nicely. I can only imagine this will improve with weights and dampers. I do see why this scope would not be ideal for astrophotograpy though. I would think it would not be impossible, but you would have to ensure the scope is deployed on a solid foundation and go to great lengths not to disturb the scope in any way. I was able to configure and control my scope with Celestron's enclosed NexStar Observer List (NSOL) software and the freeware Stellarium packages relatively painlessly. Install the drivers that come with your USB-to-Serial Port adapter. (The computer interface to the NexStar handset requires a serial RJ-11 phone jack. Celestron sells a cable with an RJ-11 phone connector on one end and computer 9-pin RS-232 serial port connector on the other. Most likely your computer/laptop will not have a serial port, so you will have to further adapt this to USB) My laptop configured the COM3 serial port, but your mileage may vary depending on your system. Make sure to restart your computer once the drivers are installed. Truth in advertising, I tested my scope indoors using an arbitrary alignment. The scope tracked and moved what seemed to be the proper azimuths and elevations for the objects I selected in the software. Any issues I find in the wild once I get the scope outside again can likely be mitigated with the anti-backlash settings for the motor drive. If there is anything significant I find, I'll make an update! Regarding some of the slewing, anti-backlash, and cord wrap settings, I would have appreciated a little more information in the manual as to what the settings actually do and how they work. I did see an example where my scope attempted to go the long way around counterclockwise to a position that just should have been about 10 degrees clockwise. This was very likely due to bad settings in the aforementioned utilities. I made a few tweaks after that and the problem seems to be alleviated, though I am not exactly sure which setting did the trick! :-) At the end of the day, I have to say that for the money, this scope does everything it is intended to do. Have some realistic expectations going in. You are not going to get Hubble Space Telescope views out of this scope! But you will get a lot of enjoyment out of it if you take the time to set it up and align it properly. I did get a good view of a deep space galaxy, which as many have stated, was simply a distant smudge of stars. However, it was clearly visible amongst the background of distinct stars.
R**H
Good enough to view moon
Good enough to see Moon and Sun but planets require more Zoom capability.
I**A
First Light on Celstron NexStar 127SLT MAK
In my opinion, this is an excellent beginner/intermediate or advanced grab and go scope providing crisp images, ease of use and many desirable software capabilities. I recommend it. My training is in the physical sciences but not specializing in Astronomy or Astrophysics. I have always had interest in the stars from childhood and from having been a navigator in a destroyer during my naval service where I used them to navigate by. Several years ago when I retired I purchased two 1960s vintage equatorial mount 60mm refractors at garage sales and I have been using them while I did some research and reading to decide on the best next telescope to purchase. I decided on a Maksutov-Cassegrain due its reputation for crisp, clear images and on Celestron NexStar for its quality reputation and the features of its GoTo/tracking software program. The deciding factor was that it was on sale at a large discount. I did consider Meade and Orion scopes before deciding on this particular Mak. This year (2013) I took some of my tax refund dollars and purchased the Celestron NexStar 127 SLT Mak and also purchased some of what I consider to be essential accessories. The purchase price of the tube and mount are only part of the price for a complete capable system. Beyond the sock items provided in the initial package, you will need lenses, filters, adapters, etc to fully exploit the capabilities of the mount, software and optics. In other words, to see the most, coolest stuff. By the time I have purchased all of the essential accessories to do this, they will cost almost as much as the telescope itself. I have used the telescope every clear night for the last several weeks and I am very pleased. The NexStar program and alignment are easy to use and provide a better that ballpark result when going to an object. I did purchase the GPS unit, the Celestron accessory kit with additional lenses and filters, the house current and car battery power adapter chords, the USB interface cord, and the light pollution and oxygen filters. I live in the Phoenix suburb of Glendale so light pollution is a factor. The filters help. So far everything works beautifully. My only two complaints are not vital but more nuisance -that the GPS can take some time to synch -- be patient, I was not and had some self inflicted difficulties the first time I used the Mak. -the tripod can be a little wobbly. I will eventually get a heavier tripod, the GPS is what it is. I will try adding some five or ten pound weights to the tripod to see if that stabilizes it sufficiently. I am not done with accessories. Next on my list is a hard case for the tube and a canvass bag for the tripod and accessories so I can safely carry the system to the dark sky sites and star parties. I do want to try some web cam photography of solar system objects so a webcam purchase is in the future. Further down the road, I will get a digital camera adapter, a collimation lens and some higher quality viewing lenses and perhaps a dielectric diagonal. Though I want to eventually get a large GoTo Dobsonian and I always lust after a nice, large Apochromatic telescope with a solid EQ mount for astrophotography,for now I am very happy with my NexStar 127 SLT Mak. I will update as I do new things with the Mak or as I learn new things that may be of interest to buyers. May your skies be clear and dark. Iñigo de Oña Nome de plume
Trustpilot
2 months ago
4 days ago